Current Revision posted to Structural Analysis and Design - Wiki by Shany on 2/18/2014 10:25:49 AM
![]()
| | | | |
| | Applies To | | |
| | | | |
| | Product(s): | STAAD.Pro | |
| | Version(s): | All | |
| | Environment: | N/A | |
| | Area: | Modeling | |
| | Subarea: | Load Generation | |
| | Original Author: | Bentley Technical Support Group | |
| | | | |
- Is it possible to specify a displacement and then have STAAD analyze a frame to give me a corresponding load (the load that would have been required to produce that displacement)?
- I am applying a UBC seismic load on a bridge. The analysis engine reports an error message which says that:EITHER NA OR NV FACTOR HAS NOT BEEN SPECIFIED WHILE SEISMIC ZONE HAS BEEN SPECIFIED AS 4.
- I would like to create a REPEAT LOAD case whose constituent load cases are themselves REPEAT LOAD cases. Is this allowed?
- After determining the lateral loads using Staad UBC seismic analysis in a first file, I note down the lateral loads computed at each joint. In a second separate file with the same frame model, I apply the lateral loads from the first file combining them with the gravity loads and perform the analysis. I consider this procedure of mine very tedious in case of a 3D high rise building most specifically in view of the first file. Is there any shorter procedure for this? Please take note that I am using the Command File Editor.
- I am trying to analyse a structure which consists of a large dia pipe supported at discrete points. I am unable to get STAAD to analyse this for UBC loads.
- I am modelling a steel building consisting of columns and beams. The floor slab is a non-structural entity which, though capable of carrying the loads acting on itself, is not meant to be an integral part of the framing system. It merely transmits the load to the beam-column grid. There are uniform area loads on the floor (think of the load as wooden pallets supporting boxes of paper). Since the slab is not part of the structural model, is there a way to tell the program to transmit the load to the beams without manually figuring out the beam loads on my own?
- When does one use FLOOR LOAD and when does one use ELEMENT LOAD?
- What is the difference between the LOAD COMB & REPEAT LOAD commands?
- I am modelling an elevated silo which will be used for storing grain. The columns which support the structure are modelled as members and the walls of the silo (containment part of the structure) are modelled using plate elements. The silo has vertical and sloping walls. The loads on the structure consist of the weight of the grain contained in the silo. What is the best method for applying the load when the silo is full of grain? As pressure loads on the inside? How should the load be applied on the sloping walls?
- I modeled a curved beam using cylindrical coordinates and tried to run a moving load over the curved beam. STAAD.Pro is not allowing me to do this. Why?
- What is the significance of the Rw Value in the UBC code?
- How is the wind load calculated/generated for a structure in STAAD.Pro ? What is the exposure factor calculated and how is it calculated? In 2002, I hear you can now define your own "panels"? What does this mean?
- I am using the moving load generation. The truck that I am specifying is so wide (dimension perpendicular to direction of traffic) that within the width of one lane of traffic, there are 3 or more parallel beams along the direction of traffic. How does STAAD determine how the truck load should be converted to beam loads?
- For moving load generation, does STAAD provide the location of all the moving point loads in terms of member number and distance from the start of the member?
- How does STAAD consider the moving load over the beams if the load is not applied over a beam exactly?
- If we have a wind load on a bracing system (perpendicular to the bracing plane), can we apply the wind loading directly to the brace as a uniform load instead of resolving the force into point loads? How does Staad handle this type of loading on members that are declared trusses?
- I am using the moving load generation facility to generate a set of load cases for a truck moving on a bridge. Can STAAD provide the support reactions for the critical position that produces the maximum effects on the system flooring?
- I have some distributed loads on some members of the model. I would like to consider the weights due to these loads in the base shear calculation for UBC load generation. Can you explain the process for doing this?
- What is JOINT WEIGHT? I'm trying to learn how to use the seismic load generator and I don't see anything explaining what JOINT WEIGHT is or what it is used for.
- How do I get STAAD to automatically combine static load cases with load cases generated using the MOVING LOAD generation facility?
- How to calculate the temperature parameter f1 and f2 for applying temperature load on the
structure? - I have multiple structures modeled in STAAD with varying heights and I want to use the Automatic Seismic Load Generation in STAAD. Can STAAD still properly distribute the seismic forces even though my structures are disjointed ?
- I defined dead and live loads as reference load cases and I used these cases for specifying seismic weights as part of my seismic load definition. Do I have to re-define the dead loads and live loads as part of the seismic load case ?
- Can STAAD automatically calculate the seismic forces both in horizontal and vertical direction required by ASCE as shown next E = (Rho) x QE (+/-) 0.2 x SDS x D
- I am trying to generate moving loads but keep getting a message "Cannot create Load Generation command".
- I can define Load Envelopes consisting of groups of loads and find that there are types like STRENGTH, SERVICEABILITY, COLUMN etc that I can choose from. What does these envelope types mean ?
- I want to exclude some of my members from taking wind loading generated by STAAD. I cannot use the XR and YR to eliminate these members as there are other members within the same range that has to take up wind loading. Is there a way to do that ?
1. Is it possible to specify a displacement and then have STAAD analyze a frame to give me a corresponding load (the load that would have been required to produce that displacement)?
You first need to know the pattern or arrangement of the loading which will eventually cause the displacement you wish to see. This is because, there can be millions of loading arrangements which cause that amount of displacement at that node, so one needs to have an idea of which of those patterns is the one that one wants. By pattern, we are talking of details like, is the load going to consist of concentrated forces at nodes, or distributed and trapezoidal loads on members, or pressures on plates, etc. For example, any of these loads will cause a certain amount of displacement at a node along a certain direction.
So, a unit load analysis would be the best approach for solving this kind of a problem. That means, all the components of the loading pattern would be represented by unit loads. Let us say that by applying a member load of 100 pounds/ft, you get 0.4 inches of displacement along global X at node 43. So, if the final desired displacement at node 43 along X is say, 1.2 inches, the applied load should be simply (1.2/0.4)*100 = 300 pounds/ft.
2. I am applying a UBC seismic load on a bridge. The analysis engine reports an error message which says that:
EITHER NA OR NV FACTOR HAS NOT BEEN SPECIFIED
WHILE SEISMIC ZONE HAS BEEN SPECIFIED AS 4.
This is due to the fact that, for your model, STAAD looks at the data under the DEFINE UBC LOAD command and concludes that you intend to analyse the structure per the UBC 1997 code. It then checks whether all the required parameters have been specified for that code, and detects that NA and NV are missing. You perhaps have an input similar to the one below :
DEFINE UBC LOAD
ZONE 0.4 I 1 RWX 12 RWZ 12 STYP 1.2 PX 0.2626 PZ 0.2626
For Zone 4, Na and Nv are two of the fundamental parameters necessary to calculate the base shear. If you look at Tables 16-Q and 16-R on pages 2-34 & 2-35 of the UBC 1997 code, you will find that for Zone 4, the coefficients Ca and Cv are dependent on Na and Nv.
So, specify the NA and NV parameters, so that the commands look similar to the one below :
DEFINE UBC LOAD
ZONE 0.4 I 1 RWX 12 RWZ 12 STYP 1.2 NA 1.6 NV 1.6 PX 0.2626 PZ 0.2626
3. I would like to create a REPEAT LOAD case whose constituent load cases are themselves REPEAT LOAD cases. Is this allowed?
You can do this if you have STAAD.Pro version 2002 or later. An example of this is shown below.
LOADING 1
SELFWEIGHT Y -1.0
LOAD 2
REPEAT LOAD
1 1.0
JOINT LOAD
4 5 FY -15. ; 11 FY -35.
LOAD 3
REPEAT LOAD
2 1.0
MEMB LOAD
8 TO 13 UNI Y -0.9 ; 6 UNI GY -1.2
LOAD 4
SELFWEIGHT Y -1.0
JOINT LOAD
4 5 FY -15. ; 11 FY -35.
MEMB LOAD
8 TO 13 UNI Y -0.9 ; 6 UNI GY -1.2
PERF ANALY
LOAD LIST 3 4
PRINT *** RES
FINISH
In the above example, load case 3 repeats load case 2, which in turn repeats load case 1.
4. After determining the lateral loads using Staad UBC seismic analysis in a first file, I note down the lateral loads computed at each joint. In a second separate file with the same frame model, I apply the lateral loads from the first file combining them with the gravity loads and perform the analysis. I consider this procedure of mine very tedious in case of a 3D high rise building most specifically in view of the first file. Is there any shorter procedure for this? Please take note that I am using the Command File Editor.
There is absolutely no need for you to take the lateral load data from the output of the first file, and insert it as input into the second file. In STAAD, once the lateral loads due to UBC or IBC are generated, they are automatically available for combining with gravity loads, or any other loads for that matter. Consequently, there are 2 ways in which this combination can be achieved, and each is demonstrated below :
Method 1 :
Generate the lateral load in one load case. Specify the gravity load in another load case. Then, combine the two in a load combination case.
LOAD 1 - GENERATE LATERAL LOADS DUE TO UBC ALONG X
UBC X 1.0
LOAD 2 - SPECIFY GRAVITY LOADS
SELFWEIGHT Y -1.0
MEMBER LOAD
1 TO 25 UNI GY -1.2
JOINT LOAD
10 39 FY -10.0
LOAD COMBINATION 3 - COMBINE THE LATERAL AND GRAVITY LOADS IN ONE CASE
1 1.0 2 1.0
Method 2 :
Create a single load case in which the lateral forces are generated, and gravity loads are specified.
LOAD 1 - LATERAL LOADS + GRAVITY LOADS
UBC X 1.0
SELFWEIGHT Y -1.0
MEMBER LOAD
1 TO 25 UNI GY -1.2
JOINT LOAD
10 39 FY -10.0
5. I am trying to analyse a structure which consists of a large dia pipe supported at discrete points. I am unable to get STAAD to analyse this for UBC loads.
When the UBC committee came up with the recommendations for analysing structures subjected to earthquakes, the type of structures they had in mind were conventional style buildings where the base of the model, namely, the points where the supports are located is at the lowest elevation with respect to the rest of the model.
If you look at the UBC procedure, it involves computation of the base shear, which then has to be distributed over the height of the building, so that one can then calculate the inter-story shears. A certain amount of the weight gets lumped at the highest point of the building, and the rest gets distributed along the height. In other words, the principle is that a mass at any height of the building is subjected to an acceleration and the force caused by the acceleration is represented by a concentrated force where the mass is located. The summation of all such forces at a given floor cause the columns beneath that floor to be subjected to a shear force.
When you talk of a model like a pipe which is defined as line members attached to several collinear nodes, all of which are at the same elevation, the UBC rules become impossible to apply. The fact is, to analyse your structure for seismic effects, you do not even need the elaborate procedure of the UBC code. You can take the selfweight, and any imposed loads on the pipe, and apply them along a horizontal direction like X or Z with a factor, and you will get what is normally expected in a seismic analysis.
So, you just have to have
LOAD 2
SELF X n
where n is a number like 1.5, which represents that there is a net force of 1.5 times the weight of the structure acting along the X direction due to an earthquake. For better handling of the distributed loads, you might want to consider defining several nodes along the length of the pipe, between supports.
6. I am modelling a steel building consisting of columns and beams. The floor slab is a non-structural entity which, though capable of carrying the loads acting on itself, is not meant to be an integral part of the framing system. It merely transmits the load to the beam-column grid. There are uniform area loads on the floor (think of the load as wooden pallets supporting boxes of paper). Since the slab is not part of the structural model, is there a way to tell the program to transmit the load to the beams without manually figuring out the beam loads on my own?
STAAD's FLOOR LOAD option is ideally suited for such cases. This is a facility where you specify the load as a pressure, and the program converts the pressure to individual beam loads. Thus, the input required from the user is very simple - load intensity in the form of pressure, and the region of the structure in terms of X, Y and Z coordinates in space, of the area over which the pressure acts.
In the process of converting the pressure to beam loads, STAAD will consider the empty space between criss-crossing beams (in plan view) to be panels, similar to the squares of a chess board. The load on each panel is then tranferred to beams surrounding the panel, using a triangular or trapezoidal load distribution method.
Additional information on this facility is available in example problem 15 in the examples manual, and section 5.32.4 in the STAAD.Pro Technical Reference manual.
7. When does one use FLOOR LOAD and when does one use ELEMENT LOAD?
When modelling a grid system made up of horziontal beams and the slabs which span between the beams, we have found that there are 2 approaches that users take :
1) They model the beams only, and do not include the slabs in the model. However, they take into account the large inplane stiffness of the slab by using the master-slave relationship to tie together the nodes of the deck so that a rigid diaphragm effect is simulated for the horizontal plane at the slab level.
2) They model the slabs along with the beams. The slabs are modelled using plate elements.
The question that arises is, how does one account for the distributed loading (load per area of floor) which is present on top of the slab?
If you model the structure using method (1), the load can be assumed to be transferred directly on to the beams. The slab-beam grillage is assumed to be made up of a number of panels, similar to the squares of a chess board. The load on each panel is then tranferred to beams surrounding the panel, using a triangular or trapezoidal load distribution method. You can do this in STAAD by defining the load intensity in the FLOOR LOAD command. In other words, the pressure load on the slabs (which are not included in the model) are converted to individual beam loads by utilizing the FLOOR LOAD facility.
In method (2), the fact that the slab is part of the model makes it very easy to handle the load. The load can be applied on individual elements using the ELEMENT LOAD facility. The connectivity between the beams and elements ensures that the load will flow from the plates to the beams through the columns to the supports.
8. What is the difference between the LOAD COMB & REPEAT LOAD commands?
The difference lies in the way STAAD goes about calculating the results - joint displacements, member forces and support reactions. For a load combination case, STAAD simply ALGEBRAICALLY COMBINES THE RESULTS of the component cases after factoring them. In other words, for example, in order to obtain the results of load 10, it has no need to know what exactly is it that constitutes load cases 3, 4 and 5. It just needs to know what the results of those cases are. Thus, the structure is NOT actually analysed for a combination load case. With a REPEAT LOAD case however, the procedure followed is that which occurs for any other primary load case. A load vector {P} is first created, and later, that load vector gets pre-multiplied by the inverted stiffness matrix.
9. I am modelling an elevated silo which will be used for storing grain. The columns which support the structure are modelled as members and the walls of the silo (containment part of the structure) are modelled using plate elements. The silo has vertical and sloping walls. The loads on the structure consist of the weight of the grain contained in the silo. What is the best method for applying the load when the silo is full of grain? As pressure loads on the inside? How should the load be applied on the sloping walls?
There are 2 segments of the tank which have to be individually considered for application of the load.
The vertical walls
------------------
The material in the tank, especially if it is a fluid, will exert a lateral pressure on the vertical walls of the tank. This pressure load can be applied on the tank using the ELEMENT PRESSURE load facility. You can use one of 2 options to do this.
a) A uniform pressure. If you take any individual element on the wall, if you know the pressure intensity at the top edge, and the pressure intensity at the bottom edge, the average of these 2 intensities can be applied as a constant pressure on the entire surface of the element, as in the following example :
45 PRESSURE -3.5
Since the load is along the local Z axis of the element, you do not have to specify the axis name in the above command since local Z is the default for the axis. The load value must be accompanied by the proper sign (positive or negative) which accounts for whether the load acts along or opposite to the direction of the local Z axis.
b) A trapezoidally varying pressure.
In case (a) above, we decided to take the average of the pressures at the top and bottom edges, and thus obtain a uniform pressure. However, this is not absolutely necessary. The load can be applied as a trapezoidal load, in which case, the TRAP option is used and the intensities at the top and bottom edges must be specified. An example of that is
45 PRESSURE TRAP Y -4.5 -2.5
In this example, it is assumed that the local Y axis of element 45 is along the vertical direction, and thus the trapezoidal variation is along the local Y. The load itself acts perpendicular to the surface of the element, and hence along local Z. If local Y is in the same sense as global Y, -4.5 indicates the intensity at the lower edge, and -2.5 indicates the intensity at the upper edge.
If the vertical wall has many divisions along the vertical direction, there will be several "horizontal rings" of elements. Every element contained in a ring has the same intensity at its top and bottom edge. That means, the top & bottom intensity for each of those rings will have to be manually calculated. There is a facility in the STAAD.Pro GUI to simplify this task. From the top of the screen, select Commands - Loading - Load Commands - Element - Hydrostatic Trapezoidal, and provide the intensities at the top and bottom edges of the vertical wall. The program will use the linear interpolation method to find the intensity at each intermediate division, and then create the individual element TRAPEZOIDAL loads.
The sloping walls
-----------------
The load on the elements which make up these walls is derived from the weight of the column of material directly above these elements, and acts along the global vertical downward direction. Since the element TRAP load facility that is available in STAAD allows a load to be applied only along the local Z axis, and since local Z is not parallel to any of the global directions, the TRAP load option cannot be used here. Hence, one will have to apply these as uniform pressure loads, the value of which has to be calculated for each sloping element as the average of the intensities at the 4 nodes of that element. There is no generation facility currently available in the program to automate this task.
10. I modeled a curved beam using cylindrical coordinates and tried to run a moving load over the curved beam. STAAD.Pro is not allowing me to do this. Why?
Moving load on curved beams is not supported by the DEFINE MOVING LOAD command in STAAD.Pro. The STAAD moving load generator assumes:
1)All loads are acting in the negative global vertical (Y or Z) direction. The user is advised to set up the structure model accordingly.
2)Resultant direction of movement is determined from the X, Y and Z increments of movements as provided by the user.
However, STAAD.beava, an automated bridge load generator, can handle moving loads for curved or custom-defined bridge decks with beams and plates. It also generates a 3D influence surface based on displacements, support reactions, beam forces or plate stresses for any point on the bridge. The critical loading patterns and critical vehicle position will be identified as well. STAAD.beava is an integrated module in the STAAD.Pro environment.
11. What is the significance of the Rw Value in the UBC code?
The UBC 1997 code defines Rw as a Numerical Coefficient representative of the inherent overstrength and global ductility capacity of lateral-force resisting systems.
It is to be used in the equation for computing base shear. Its values are dependent on the type of lateral-force resisting system in the building, such as whether the system is a Light-framed wall with shear panels or Shear wall made of concrete or a special moment resisting frame, etc.
Values of Rw are listed in Tables 16-N and 16-P of the UBC 1994 and 1997 codes.
12. How is the wind load calculated/generated for a structure in STAAD.Pro ? What is the exposure factor calculated and how is it calculated? In 2002, I hear you can now define your own "panels"? What does this mean?
The DEFINE WIND LOAD command may be used to define the parameters for automatic generation of wind loads on the structure. The user needs to define the intensity and corresponding heights along with the exposure factors. If the exposure factor is not defined, the program takes the default value as 1.0.
A value of 1.0 means that the wind force may be applied on the full influence area associated with the joints if they are also exposed to the wind load direction.
All loads and heights are in the current unit system. In the list of intensities, the first value of intensity (p1) acts from the ground level up to the first height. The second intensity (p2) acts in the global vertical direction between the first two heights (h1 and h2) and so on. The program assumes that the ground level has the lowest global vertical coordinate of any joint entered for the structure.
The exposure factor (e) is the fraction of the influence area associated with the joint(s) on which the load may act if it is also exposed to the wind load. Total load on a particular joint is calculated as follows.
JOINT LOAD = (Exposure Factor) x (Influence Area) x (Wind Intensity).
Exposure factor (User specified) = (Fraction of Influence Area) x (influence width for joint).
In STAAD.Pro 2002, the built-in wind load generation facility has been enhanced to allow the user to specify the actual panels of the building which are exposed to the wind. This user-level control will now allow the user to obtain a more accurate distribution of wind forces, especially when the exposed surface of the building lies in several vertical zones, each reset from the one below or the one above, in terms of the direction of wind force. Further, the basic algorithm for detecting the shape of the panels and the amount of load which should be calculated for the panel corners too has undergone significant improvements. The parameters for definition of the wind load types are described in Section 5.31.3 of the STAAD.PRO Technical Reference Manual. The relevant extracts from Section 5.32.12 of the STAAD.Pro Technical Reference Manual, where the method for applying wind loading in the form of a data in load cases has been explained, is provided below. Note that areas bounded by beam members (and ground), and exposed to the wind, are used to define loaded areas (plates and solids are ignored). The loads generated are applied only at the joints at vertices of the bounded areas. For example, in the following set of commands:
DEFINE WIND LOAD
TYPE 1
INTENSITY 0.1 0.12 HEIGHT 100 200
EXP 0.6 JOI 1 TO 25 BY 7 29 TO 37 BY 4 22 23
TYPE 2
INT 0.1 0.12 HEIGHT 100 900
EXP 0.3 YR 0 500
LOAD 1
SELF Y -1.0
LOAD 2
WIND LOAD Z 1.2 TYPE 2 ZR 10 11
LOAD 3
WIND LOAD X TYPE 1 XR 7 8
A minus sign indicates that suction occurs on the other side of the selected structure. If all of the members are selected and X (or Z) is used and the factor is positive, then the exposed surfaces facing in the -x (or -z) direction will be loaded in the positive x (or z) direction (normal wind in positive direction). If X and a negative factor is used, then the exposed surfaces facing in the +x direction will be loaded in the negative x direction (normal wind in negative direction). [If -X is entered and a negative factor, then the exposed surfaces facing in the -x direction will be loaded in the negative x direction (suction). If -X is entered and a positive factor, then the exposed surfaces facing in the +x direction will be loaded in the positive x direction (suction).] A member list or a range of coordinate values (in global system) may be used. All members which have both end coordinates within the range are assumed to be candidates for defining a surface which may be loaded if the surface is exposed to the wind. The loading will be in the form of joint loads (not member loads). 1, 2 or 3 ranges can be entered to form a "layer", "tube" or "box" for selecting members in the combined ranges. Use ranges to speed up the calculations on larger models.
It is advisable not to use the SET Z UP command in a model with wind load. A closed surface is generated by the program based on the members in the ranges above and their end joints. The area within this closed surface is determined and the share of this area (influence area) for each node in the list is then calculated. The individual bounded areas must be planar surfaces, to a close tolerance, or they will not be loaded. Hence, one should make sure that the members/joints that are exposed to the wind make up a closed surface (ground may form an edge of the closed surface). Without a proper closed surface, the area calculated for the region may be indeterminate and the joint force values may be erroneous. Consequently, the number of exposed joints should be at least 3.
13. I am using the moving load generation. The truck that I am specifying is so wide (dimension perpendicular to direction of traffic) that within the width of one lane of traffic, there are 3 or more parallel beams along the direction of traffic. How does STAAD determine how the truck load should be converted to beam loads?
Based on the data you provide under the DEFINE MOVING LOAD command, each truck is treated as a set of axles. If the WIDTH option is NOT specified, each axle is assumed to be comprised of 1 tire. If the WIDTH option is specified, each axle is assumed to be comprised of 2 tires.
The program looks at each tire independently. For any given tire, it looks for one longitudinal beam to the left of the tire, and another longitudinal beam to the right of the tire. Then it distributes the tire weight on those 2 beams as though the tire is located on a simply supported cross beam that spans the two longitudinal members on either side.
Thus, even if a lane spans across 3 longitudinal beams or for that matter several beams, the above approach ensures that the tire weights get properly applied on the correct set of beams as concentrated member loads.
You can get a listing of these concentrated member loads by using the command:
PERFORM ANALYSIS PRINT LOAD DATA
14. For moving load generation, does STAAD provide the location of all the moving point loads in terms of member number and distance from the start of the member?
Yes. Please use the PRINT LOAD DATA option with your PERFORM ANALYSIS command and you will get the information in your output file.
15. How does STAAD consider the moving load over the beams if the load is not applied over a beam exactly?
If a wheel falls inside a panel composed of beams on either side of the wheel running parallel to the direction of movement of the vehicle, the load is distributed on the 2 beams as simply supported reactions. Hence, if the wheel load is 10 kips, and if the distance from the wheel to the beam on the left is 7 ft, and the distance to the beam on the right is 3 ft, the beam on the left gets a 3 kip load, and the beam on the right gets a 7 kip load.
16. If we have a wind load on a bracing system (perpendicular to the bracing plane), can we apply the wind loading directly to the brace as a uniform load instead of resolving the force into point loads? How does Staad handle this type of loading on members that are declared trusses?
If a transverse load such as a uniform distributed load or a concentrated force is applied on a truss member, STAAD converts it to the equivalent concentrated shears at the 2 ends of the member. The member end force output will show them as shears on the member under the output terms SHEAR-Y or SHEAR-Z depending on the local axis direction the load is applied in.
However, if you determine the equivalent end shears and apply them as joint loads instead, and not as a member load, the truss members at that node will not experience any shear force due to that load.
17. I am using the moving load generation facility to generate a set of load cases for a truck moving on a bridge. Can STAAD provide the support reactions for the critical position that produces the maximum effects on the system flooring?
This would require that the support reactions for all generated load cases be produced in a report form sorted in a descending order based upon the specific support reaction criteria we are interested in, such as the FY force, or the MZ moment.
To get this report, first run the analysis. Go to the Post processing mode. Select the support node(s) at which you want the information you are seeking. From the top of the screen, select Report | Support Reactions. In the dialog box that comes up, select the degree of freedom (FY, MZ, etc.) which should be used as the criteria for sorting. Set the sorting order (high to low or low to high). From the loading tab, select the load cases that you want considered. Click on OK. A report of the results will be displayed in tabular form.
18. I have some distributed loads on some members of the model. I would like to consider the weights due to these loads in the base shear calculation for UBC load generation. Can you explain the process for doing this?
When analysing a structure for UBC loads, there 2 stages in the input. The first stage is the one where one defines data such as the various parameters (zone factor, importance factor, soil structure interaction factor, etc.) as well as the weights. In terms of the STAAD command language, it is initiated using the DEFINE UBC LOAD command, and an example for this may be found in Example 14 of the STAAD.Pro Examples manual.
Graphically, one may assign the data in the following manner.
Select the beam or beams you want to assign the distributed weights to. Next, from the top of the screen, select Commands | Loading | Define Load | Seismic Load. In the Parameters tab, select the type, and enter the relevant
values for the parameters. Press the "Save" button. A new tab called "Weights" should come up. Press the "Member Weight" button. For the loading type, choose UNI, enter the distributed weight value, distances to where the load starts and the load ends, and press "OK". Press the "Assign" button to actually assign them to the selected members. Finally, press the "Close" button.
19. What is JOINT WEIGHT? I'm trying to learn how to use the seismic load generator and I don't see anything explaining what JOINT WEIGHT is or what it is used for.
In the block of commands which fall under the DEFINE UBC LOAD heading or any of the other ones like AIJ ,1893, etc., the weight data which goes into the calculation of the total weight consists of :
SELFWEIGHT
MEMBER WEIGHT
JOINT WEIGHT
If at any of the joints of the structure, there are any weights which you want included in the total weight calculation, you specify them using the JOINT WEIGHT option.
20. How do I get STAAD to automatically combine static load cases with load cases generated using the MOVING LOAD generation facility?
You should use the option called ADD LOAD along with the LOAD GENERATION command.
Shown below is an example:
DEFINE MOVING LOAD
TYPE 1 LOAD 20. 20. 10. DISTANCE 10. 5. WIDTH 10.
LOAD 1 STATIC LOAD
SELF Y -1.0
* GENERATE MOVING LOADS AND ADD THE SELFWEIGHT
* LOAD TO EACH GENERATED LOAD CASE
LOAD GENERATION 10 ADD LOAD 1
TYPE 1 7.5 0. 0. ZI 10.
PERFORM ANALYSIS PRINT LOAD DATA
21. How to calculate the temperature parameter f1 and f2 for applying temperature load on the
structure?
You have to know three temperatures :
1) the stress-free temperature, which is the temperature that the structure was at when it was constructed or installed. Call it A.
2) The temperature of the top fiber (the fiber that is farthest along the positive direction of the local Z axis of elements and local Y axis for beam). Call it B.
3) The temperature of the bottom fiber (the fiber that is farthest along the negative direction of the local Z axis of element and local Y axis for beam). Call it C.
When you specify the temperature load, the command is
member-list TEMPERATURE f1 f2
where
f1 = (B+C)/2 - A
f2 = B-C
f1 is the temperature that causes axial elongation / shrinkage along the longitudinal axis (local X of the member, and, local X and Y axes for the plate element).
f2 is the temperature responsible for inducing bending in the member and element.
Also, refer to article 5.32.6 of the Technical Reference Manual of Staad.pro
22. I have multiple structures modeled in STAAD with varying heights and I want to use the Automatic Seismic Load Generation in STAAD. Can STAAD still properly distribute the seismic forces even though my structures are disjointed ?
STAAD.Pro Seismic Load Generation should not be used in this case. If the structures are independent of each other, you should have 3 separate models and do seismic load generation on each model separately.
23. I defined dead and live loads as reference load cases and I used these cases for specifying seismic weights as part of my seismic load definition. Do I have to re-define the dead loads and live loads as part of the seismic load case ?
Related question : I defined dead loads, live loads for seismic weight calculation as part of my seismic load definition. Do I again need to specify the dead and live loads as part of the seismic load cases ?
No you do not need to. Once the seismic weight is defined ( either through reference load or through the various seismic weight definition options ) as part of the seismic load definition, the software is able to figure out the total seismic weight. You do not need to redefine. Doing so would apply these as additional loads to the ones already defined.
24. Can STAAD automatically calculate the seismic forces both in horizontal and vertical direction required by ASCE as shown next
E = (Rho) x QE (+/-) 0.2 x SDS x D
The seismic load generation in STAAD only calculates the horizontal portion QE. The factors like Rho or the vertical effect factors like 0.2SDS has to be calculated manually and applied as factors to the appropriate loads when defining load combinations.
25. I am trying to generate moving loads but keep getting a message "Cannot create Load Generation command".
Most likely you have LOAD COMBINATIONS already defined as part of the file and there is not enough gap in numbering between the last primary load case and the load combination to accomodate the number of moving load generations that has been asked for. For example if you have
LOAD 1 DEAD LOAD
SELF Y -1.0
*
LOAD 2 LIVE LOAD
MEMBER LOAD
100 TO 150 UNI GY -1
*
LOAD COMB 3 DEAD + LIVE
1 1.0 2 1.0
then if you try to generate 30 moving load cases as shown next
LOAD GENERATION 30
TYPE 10 12 1 0 ZINC 1
Here are a couple of options to handle this scenario.
Change the LOAD COMBINATION number to anything higher than 32 to accomodate 30 generations after load case 2. Remember these generations are all treated as primary load cases by STAAD and so has to come shead of the combinations.
Alternately you may change the LOAD COMBINATION to REPEAT LOAD as shown next
LOAD 3 DEAD + LIVE
REPEAT LOAD
1 1.0 2 1.0
REPEAT LOADs are considered as primary load case by STAAD.Pro and hence you would be able to generate the moving load generations after that without any problem.
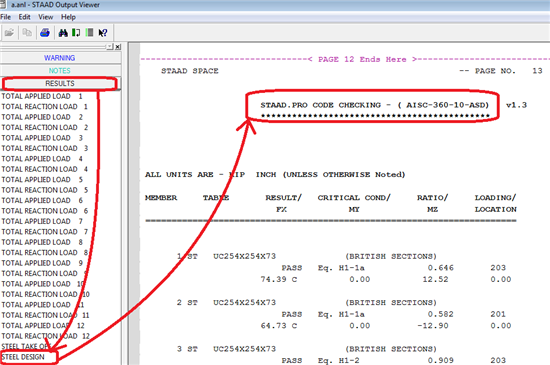
26. I can define Load Envelopes consisting of groups of loads and find that there are types like STRENGTH, SERVICEABILITY, COLUMN etc that I can choose from. What does these envelope types mean ?
The type for the envelopes are supposed to indicate what the envelope ( which is essentially a cluster of loads ) is meant to be used for. For example if the type is specified as Serviceability it would be used for serviceability checks like deflection check. STRENGTH envelope means the component loads would be used for member strength check. However as of now, all design codes in STAAD.Pro are not equipped to honor the envelope types. The latest
AISC 360 10 code check is able to do appropriate code checking based on envelope specifications SERVICEABILITY and STRENGTH. As far as the other envelope types are concerned, COLUMN was developed based on requirement obtained from a particular company who wanted to tag all the load cases for column design separately and type Connection was defined to tag all load cases to be used for connection design.
27. I want to exclude some of my members from taking wind loading generated by STAAD. I cannot use the XR and YR to eliminate these members as there are other members within the same range that has to take up wind loading. Is there a way to do that ?
Often one may need to apply wind loading on a specific set of members in a model. For example one may have cross braces in a vertical plane and may have wind load acting normal to the plane of these braces, which one may not want the braces to take. In such situations, one may define a group consisting of members which are expected to take the wind load and apply the
wind loading on these groups as shown next. As of now the data has to be entered using the editor as there are no options in the GUI for doing this
![]()
In the above example, wind loading type 2 and 4 has been applied on two separate member groups _X_AT_WEST and _X_AT_EAST respectively.
See Also
Product TechNotes and FAQs
Structural Product TechNotes And FAQs
External Links
Bentley Technical Support KnowledgeBase
Bentley LEARN Server
Comments or Corrections?
Bentley's Technical Support Group requests that you please confine any comments you have on this Wiki entry to this "Comments or Corrections?" section. THANK YOU!
Tags: FAQs, Load Generation, STAADPro, load


 .
.


